
Table Of Contents
- 1 Importance of running boards for vehicles
- 2 How To Install Running Boards: Overview of the article’s purpose and content
- 3 Understanding Running Boards
- 4 Pre-Installation Preparation for Running Boards
- 5 Step-by-Step Running Boards Installation Process
- 6 Expert Tips and Tricks for Install Running Boards
- 7 Troubleshooting and Common Mistakes in Running Boards Installation
- 8 Maintenance and Care of Running Boards
- 9 How To Install Running Boards: FAQ
- 9.1 Q: How much does it cost to install running boards?
- 9.2 Q: How long does it take to install running boards?
- 9.3 Q: How to install running boards on a Dodge Ram?
- 9.4 Q: How to install running boards on a GMC Sierra?
- 9.5 Q: How to install running boards on a Jeep Wrangler?
- 9.6 Q: How to install running boards on a Toyota 4Runner?
- 9.7 Q: How to install running boards on a Ford F-150 (2018)?
- 9.8 Q: Who can install running boards?
- 9.9 Q: How to install electric running boards?
- 9.10 Q: How to install specific running board models, such as Aries 2074110 on a 2018 Ram 1500?
- 10 How To Install Running Boards: Conclusion
Importance of running boards for vehicles
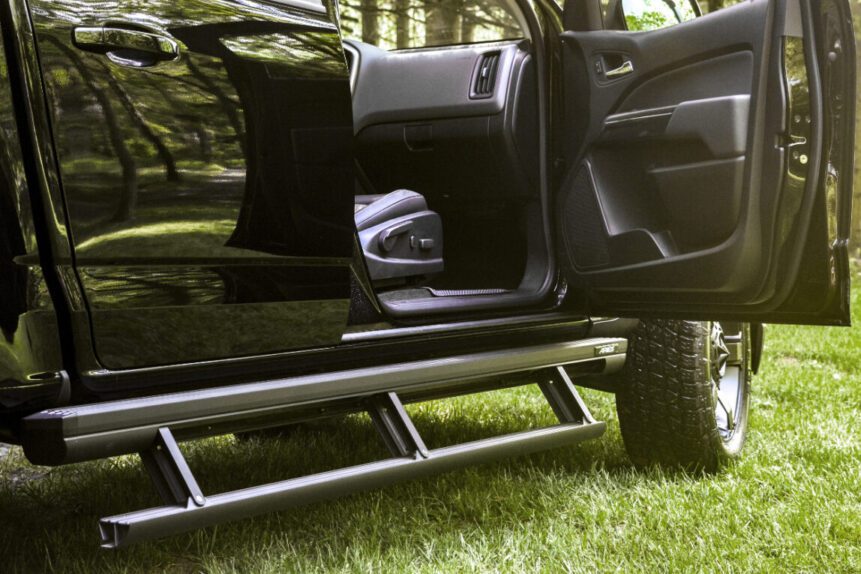
When it comes to enhancing the functionality and appearance of your vehicle, running boards are a fantastic addition. These handy accessories offer a multitude of benefits, making your entry and exit smoother while adding a touch of style. Whether you have a rugged truck, a versatile SUV, or an adventurous Jeep, running boards provide a convenient stepping platform for easier access to the vehicle’s cabin. Not only do they offer practicality, but they also contribute to the overall aesthetics of your ride.
How To Install Running Boards: Overview of the article’s purpose and content
In this comprehensive guide, we will delve into the world of running boards and unveil expert tips and tricks for their installation. We will cover various aspects such as different types of running boards available, step-by-step installation processes for specific vehicles like Dodge Ram, GMC Sierra, Jeep Wrangler, Toyota 4Runner, Ford F-150, and others. We’ll also explore common questions such as the cost of installation, estimated installation time, and even delve into the installation of electric running boards. By the end of this article, you’ll be equipped with the knowledge and confidence to install running boards on your vehicle efficiently and effectively.
Understanding Running Boards
Definition and purpose of running boards
Running boards, also known as side steps or nerf bars, are accessories attached to the sides of vehicles to facilitate easier entry and exit. They typically extend from the front to the rear wheel well and provide a stable platform for stepping onto when entering or exiting the vehicle. Running boards not only offer convenience but also help protect the lower body panels from road debris and minimize the risk of damage.
Different types of running boards available
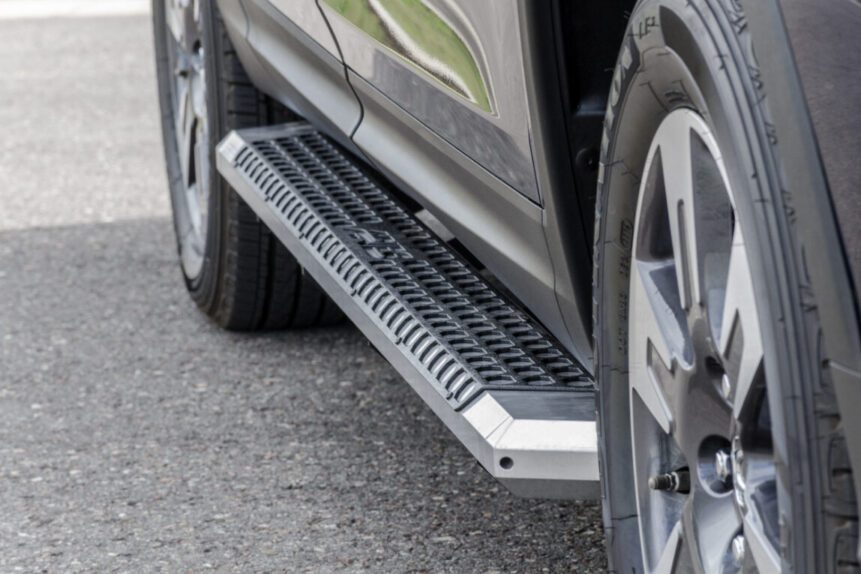
Nerf bars: Nerf bars are tubular bars that run along the sides of the vehicle, providing a sturdy step for passengers. They are available in various finishes and styles, such as stainless steel, black powder-coated, or chrome, allowing you to choose the one that suits your vehicle’s aesthetics.
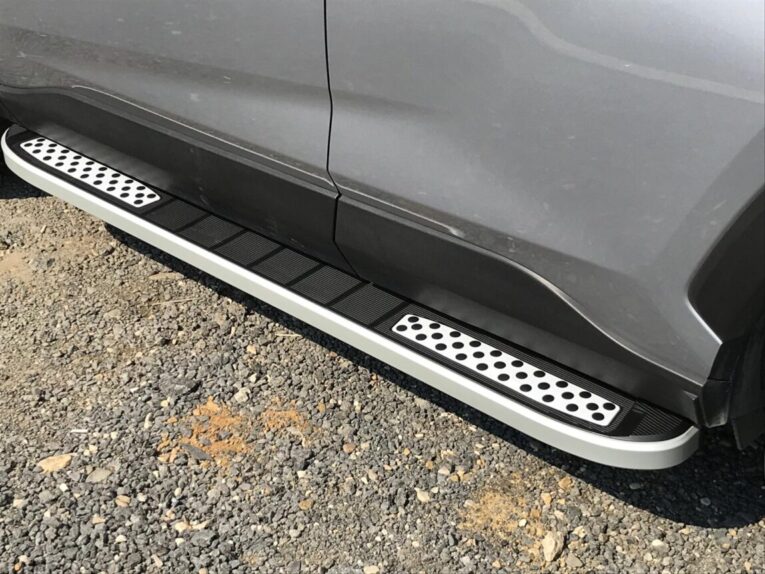
Side steps: Side steps are flat platforms attached to the vehicle’s sides, offering a broader and more stable surface for stepping on. They often feature a non-slip surface for added safety.
Electric running boards: Electric running boards are a premium option that automatically deploy and retract when the vehicle’s doors are opened and closed. These boards offer a sleek and streamlined appearance while providing convenience and functionality.
Pre-Installation Preparation for Running Boards
Gathering necessary tools and materials for Install Running Boards
Before embarking on the installation of running boards, it’s important to gather all the necessary tools and materials. Having everything at hand will streamline the installation process and ensure a smoother experience. Here’s a comprehensive list of tools and materials you may need:
- Running boards: Choose running boards that are compatible with your vehicle’s make and model. Consider factors such as design, material, and finish to match your preferences and vehicle aesthetics.
- Mounting brackets or hardware: Depending on the running board type and vehicle model, you may require specific mounting brackets or hardware. Ensure you have the correct brackets or hardware that are designed to fit your vehicle.
- Socket set: A set of sockets in various sizes will be essential for loosening and tightening bolts during the installation process.
- Wrenches: Both adjustable and combination wrenches will come in handy for tightening and adjusting bolts and nuts.
- Screwdriver set: A set of screwdrivers, including Phillips and flathead types, will be useful for removing or installing screws and other fasteners.
- Drill and drill bits: If the installation requires drilling holes, a power drill and appropriate drill bits will be necessary. Ensure you have the right drill bits for your vehicle’s body material.
- Tape measure: A tape measure will help ensure accurate positioning and alignment of the running boards during installation.
- Level: A level will aid in checking the alignment and ensuring that the running boards are installed straight and parallel to the ground.
- Rubber mallet: A rubber mallet can be handy for gently tapping and adjusting the position of the running boards or brackets during the installation process.
- Rust-resistant coatings or sealants: Consider purchasing rust-resistant coatings or sealants to protect the running boards and mounting hardware from corrosion over time.
- Safety equipment: It’s essential to prioritize safety during the installation process. Ensure you have protective gloves, safety glasses, and other appropriate safety gear to protect yourself from any potential hazards.
- Manufacturer’s instructions: Don’t forget to have the manufacturer’s installation instructions readily available. These instructions will provide specific guidance tailored to the running board model you’ve chosen and the vehicle make and model.
By gathering all the necessary tools and materials in advance, you’ll be well-prepared to tackle the installation process with confidence and efficiency. Remember to carefully read the manufacturer’s instructions and follow each step meticulously for a successful installation.
Reading the manufacturer’s instructions of Installing Running Boards
Armed with a cache of tools and materials, you stand at the precipice of destiny. But lo, before you take the plunge into the abyss of installation, pause! Amidst the chaos and clamor, a tome of ancient wisdom beckons—nay, it demands your attention. The manufacturer’s instructions, a sacred script inscribed by the divine artisans themselves, hold the key to a triumphant feat. Beware the allure of hasty leaps, for it is in the realm of thorough comprehension that victory awaits. Behold, a closer gaze into the enigmatic depths of this ritual—the profound significance of deciphering the manufacturer’s instructions:
- Familiarize yourself with the specific installation process: Every running board model may have slight variations in the installation process. The manufacturer’s instructions will provide you with step-by-step guidance tailored to the particular running boards you have chosen. By reading the instructions carefully, you’ll gain a clear understanding of how the installation should be approached.
- Identify any model-specific considerations: Different vehicle makes and models may have unique features or structural elements that require special attention during the installation process. The manufacturer’s instructions will highlight any specific considerations or modifications needed for your particular vehicle, ensuring a proper and secure fit.
- Determine the required tools and hardware: The sacred scrolls known as the manufacturer’s instructions hold the key to the tools and hardware required for your conquest. Unite these ancient texts with your gathered arsenal, and behold the checklist of power! Ensure that every blade and bolt is at your command. But wait! Should the fates decree the need for more weaponry, fear not! By consulting these instructions, you shall obtain the missing pieces, arming yourself fully before embarking on your epic installation journey.
- Understand safety precautions: The manufacturer’s instructions will often include safety precautions and warnings related to the installation process. These instructions will help you understand potential risks and hazards, ensuring that you take appropriate safety measures throughout the installation.
- Gain insights into troubleshooting and maintenance: The mystical scriptures known as the manufacturer’s instructions hold secrets beyond mere installation. Behold, for within their sacred passages lie the keys to troubleshooting and maintaining your majestic running boards. Arm yourself with this knowledge, and you shall conquer all obstacles that dare cross your path. From battling common issues to performing sacred maintenance rituals, you shall be a warrior prepared for any challenge that may arise.
- Clarify any uncertainties: Reading the instructions beforehand allows you to identify any areas where you may have questions or uncertainties. By addressing these concerns upfront, either through further research or seeking clarification from the manufacturer, you can proceed with confidence during the installation process.
The manufacturer’s instructions are like sacred scrolls of wisdom, guiding you through the mystical realm of installation. Don’t skim over them like a caffeinated squirrel on roller skates – take a moment to immerse yourself in their profound teachings. Absorb the knowledge, let it marinate in your brain, and consult the sacred scrolls as you embark on your installation quest. With this ancient wisdom at your fingertips, you’ll conquer the art of installing running boards like a true master.
Ensuring safety measures are in place
Safety should always be a top priority when undertaking any vehicle modification or installation project. As you prepare to install running boards, it’s crucial to take the necessary precautions to protect yourself and ensure a safe working environment. Here’s a detailed look at the key safety measures to consider:
- Personal protective equipment (PPE): Prepare yourself for the impending odyssey of installation by adorning your mortal vessel with the sacred relics of protection. Behold, the mystical spectacles that shield your orbs from the wrath of debris and airborne projectiles. Envelop your valiant hands in the guardian gauntlets, warding off the perils that may befall them. And let your feet be adorned with the boots of steadfastness, providing a steadfast grip upon the treacherous terrain. Clad in this formidable armor, you shall venture forth into the realm of installation, unyielding in your pursuit of triumph and safeguarded against the perils that lie in wait.
- Stable work surface: Ensure that your vehicle is parked on a stable and level surface before starting the installation. This will provide a secure foundation and minimize the risk of accidents or the vehicle rolling.
- Lift or support the vehicle securely: If the installation requires accessing the underside of the vehicle, use a reliable and safe method to lift or support it. Follow the manufacturer’s instructions for using jack stands, ramps, or a vehicle lift, ensuring they are positioned correctly and providing adequate support.
- Use proper lifting techniques: When lifting heavy running boards or other components, practice proper lifting techniques to avoid strain or injury. Lift with your legs and not your back, keeping the weight close to your body and maintaining a stable grip.
- Follow electrical safety guidelines: If you are installing electric running boards, pay special attention to electrical safety. Ensure that the vehicle’s electrical system is disconnected or the battery is disconnected before working with any wiring or electrical connections. Follow the manufacturer’s instructions regarding proper handling and connection of electrical components.
- Secure fasteners properly: During the installation, use the recommended torque specifications for tightening fasteners such as bolts or screws. Over-tightening or under-tightening can compromise the stability and safety of the running boards. Consider using a torque wrench to achieve the appropriate torque.
- Beware of sharp edges: Some running boards or vehicle components may have sharp edges. Take caution to avoid cuts or injuries by wearing protective gloves and being mindful of your surroundings. Smooth any sharp edges or cover them with protective materials if necessary.
- Be mindful of vehicle weight distribution: Keep in mind that the addition of running boards can slightly affect the weight distribution of the vehicle. Be aware of any potential changes in handling characteristics, especially if you frequently carry heavy loads or tow trailers. Adjust your driving accordingly and ensure your vehicle remains stable and balanced.
- Follow all manufacturer’s instructions: Adhere to the manufacturer’s instructions and recommendations throughout the installation process. They are specifically designed to ensure safety and optimize the performance of the running boards. If you have any doubts or concerns, reach out to the manufacturer for clarification.
Keep the chaos at bay and embrace the path of caution. By following these measures with unwavering dedication, you shall ward off the wicked specter of accidents, injuries, and catastrophic damage during the installation extravaganza. No need to rush, my dear compatriot. Take a breath, embrace the methodical pace, and carve out a safe haven for your endeavors. For in this sacred sanctuary of prudence, you shall safeguard your well-being and ensure the everlasting glory of your running boards.
Step-by-Step Running Boards Installation Process
Removing existing running boards (if applicable)
If your vehicle already has running boards or side steps installed, you’ll need to remove them before proceeding with the new installation. This typically involves loosening and removing the bolts or screws that secure the existing boards, and carefully lifting them off the vehicle. It’s important to follow the specific instructions provided by the manufacturer to ensure a smooth removal process.
Positioning the new running boards correctly
Once the old running boards are removed, it’s time to position the new running boards accurately. Refer to the manufacturer’s instructions for guidance on the proper placement and alignment. Take into account the vehicle’s body lines and contours to ensure a seamless fit and aesthetic appeal.
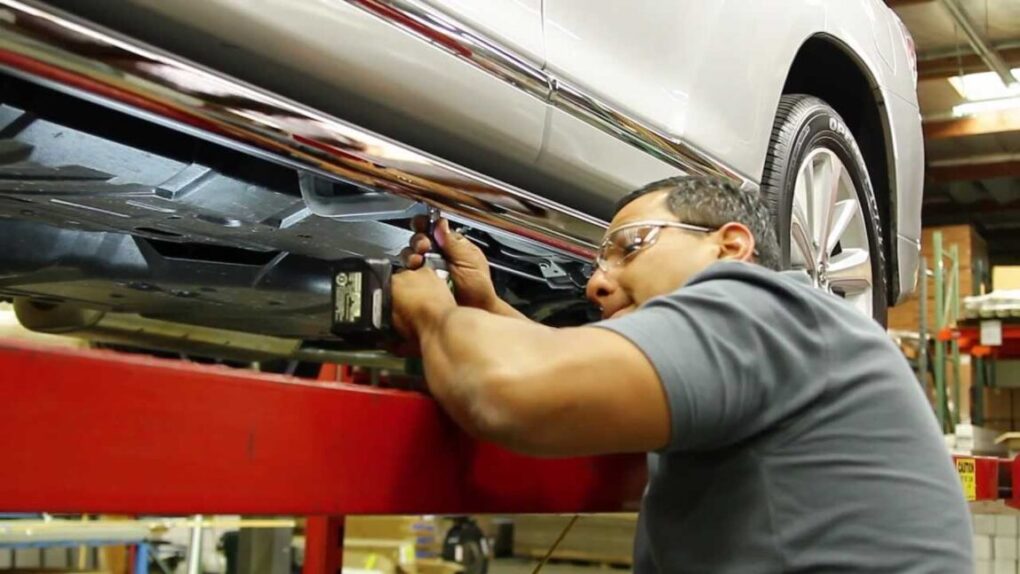
Attaching brackets or mounting hardware
Depending on the type of running boards you have, you may need to install brackets or mounting hardware to secure them to the vehicle. These components provide the necessary support and stability for the running boards. Follow the manufacturer’s instructions to attach the brackets securely, making sure they are aligned properly with the vehicle’s frame or rocker panels.
Securing running boards to the vehicle
With the brackets or mounting hardware in place, it’s time to attach the running boards to the vehicle. Carefully lift the running boards and align them with the brackets or mounting points. Insert the bolts or screws provided by the manufacturer and tighten them securely using the appropriate tools. Be mindful of the torque specifications provided in the instructions to avoid over-tightening or under-tightening.
Testing the stability and functionality
Once the running boards are securely installed, take a moment to test their stability and functionality. Apply gentle pressure and ensure they remain steady and firmly attached to the vehicle. Open and close the doors to verify that the running boards deploy and retract (in the case of electric running boards) smoothly without any obstructions.
Expert Tips and Tricks for Install Running Boards
Proper alignment and spacing of the running boards
Pay attention to the alignment and spacing of the running boards during installation. Ensuring they are parallel to the vehicle’s body and properly positioned not only enhances the overall appearance but also improves functionality and ease of use.
Applying anti-seize compound for easy removal in the future
To prevent future difficulties when removing the running boards, consider applying an anti-seize compound to the bolts or screws during installation. This will help prevent corrosion and make it easier to disassemble the components when needed.
Using torque wrenches to achieve proper tightening
Utilize torque wrenches to achieve the recommended torque specifications when tightening the bolts or screws. This ensures the running boards are securely fastened without the risk of over-tightening, which could lead to damage or under-tightening, which may compromise stability.

Ensuring compatibility with the vehicle’s make and model
Before purchasing running boards, verify their compatibility with your specific vehicle make and model. Different vehicles may require specific mounting points or modifications, so it’s essential to choose running boards designed specifically for your vehicle.
Considering professional installation for complex setups
If you encounter a complex installation process or lack the necessary tools and experience, it’s worth considering professional installation. Professional installers have the expertise and knowledge to handle intricate setups and ensure optimal results.
Troubleshooting and Common Mistakes in Running Boards Installation
Dealing with alignment issues
If you encounter alignment issues during installation, double-check the positioning of the brackets or mounting hardware. Make adjustments as necessary to achieve proper alignment and symmetry.
Over-tightening or under-tightening bolts
Avoid over-tightening or under-tightening the bolts or screws that secure the running boards. Over-tightening can damage the mounting points or components, while under-tightening may result in instability. Follow the manufacturer’s recommended torque specifications for optimal results.
Adjusting running boards for uneven surfaces
In some cases, the running boards may need adjustment to accommodate uneven surfaces. This can be achieved by loosening the bolts or screws slightly, aligning the running boards, and then re-tightening them to ensure a level and stable installation.
Addressing rust or corrosion concerns
Regularly inspect the running boards for any signs of rust or corrosion. If detected, address the issue promptly by cleaning the affected area and applying appropriate rust-resistant coatings or sealants to protect the running boards.
Maintenance and Care of Running Boards
Regular cleaning and washing of running boards
To maintain the appearance and longevity of your running boards, clean them regularly using mild soap and water. This helps remove dirt, grime, and road debris that can accumulate over time.
Applying protective coatings or sealants
Consider applying protective coatings or sealants specifically designed for running boards. These products provide an additional layer of protection against scratches, fading, and environmental elements, preserving the running boards’ aesthetics and durability.
Inspecting for damage and wear
Periodically inspect your running boards for any signs of damage, wear, or loose components. Look for cracks, dents, or loose bolts. Address any issues promptly to prevent further damage and ensure the running boards continue to function optimally.
Repairing or replacing damaged components
If you identify any damage or worn-out parts during inspection, repair or replace them as needed. Contact the manufacturer or a professional installer for guidance on obtaining replacement components or seeking repairs.
How To Install Running Boards: FAQ
Q: How much does it cost to install running boards?
A: The elusive nature of running board types, the intricate nuances of vehicle make and model, and the eternal conundrum of self-guided endeavors or the tender embrace of a seasoned professional. Within this tumultuous realm, the pendulum of pricing swings, from the humble valley of $200 to the majestic peak of $800, a spectrum that encompasses not only the essence of running boards but also the enigmatic trappings of installation accessories. Oh, the symphony of costs, forever playing the perplexing melody of uncertainty!
Q: How long does it take to install running boards?
A: The installation time for running boards can vary depending on factors such as the complexity of the installation, the vehicle’s make and model, and your level of experience. Generally, it can take anywhere from 1 to 3 hours for a standard installation. However, more complex installations or those requiring modifications may take longer.
Q: How to install running boards on a Dodge Ram?
A: To install running boards on a Dodge Ram, you will typically follow the general installation process outlined in the article. However, it’s essential to refer to the specific instructions provided by the manufacturer of the running boards you have chosen, as there may be model-specific variations in the installation process.
Q: How to install running boards on a GMC Sierra?
A: The installation process for running boards on a GMC Sierra is similar to other vehicles. Ensure you have the correct running boards designed specifically for the Sierra model, follow the manufacturer’s instructions, and pay attention to any model-specific steps or requirements mentioned in the instructions.
Q: How to install running boards on a Jeep Wrangler?
A: Installing running boards on a Jeep Wrangler requires a slightly different approach due to its unique design. Typically, you will need to use mounting brackets specifically designed for the Wrangler’s body structure. Refer to the manufacturer’s instructions for detailed guidance on the installation process tailored to the Jeep Wrangler.
Q: How to install running boards on a Toyota 4Runner?
A: The process of installing running boards on a Toyota 4Runner is similar to other vehicles. Ensure you have the correct running boards compatible with the 4Runner model, follow the manufacturer’s instructions, and pay attention to any specific details mentioned in the instructions for the 4Runner model.
Q: How to install running boards on a Ford F-150 (2018)?
A: To install running boards on a 2018 Ford F-150, refer to the manufacturer’s instructions provided with the running boards you have chosen. The installation process generally involves positioning the running boards correctly, attaching the brackets or mounting hardware to the frame or rocker panels, and securing the running boards in place.
Q: Who can install running boards?
A: If you possess the automotive prowess and the sacred tools, fear not, for the path of self-installation beckons! Follow the cryptic instructions bestowed upon you by the manufacturer, and victory shall be yours. But lo, if doubt clouds your mind or the tools elude your grasp, it is wise to seek the aid of a skilled professional, who shall ensure that your running boards find their rightful place, snug and secure.
Q: How to install electric running boards?
A: Installing electric running boards follows a similar process to other running boards, with the additional step of connecting the electrical wiring. Carefully follow the manufacturer’s instructions, which will provide guidance on routing and connecting the wiring harness to the vehicle’s electrical system.
Q: How to install specific running board models, such as Aries 2074110 on a 2018 Ram 1500?
A: To install specific running board models like the Aries 2074110 on a 2018 Ram 1500, it’s important to refer to the manufacturer’s specific instructions provided with that particular model. The instructions will provide step-by-step guidance tailored to the product and the vehicle model.
How To Install Running Boards: Conclusion
Recap of the installation process
Installing running boards on your vehicle can significantly enhance both functionality and aesthetics. By following the step-by-step installation process, considering expert tips and tricks, and addressing common mistakes, you can successfully install running boards and enjoy their benefits.
Emphasizing the importance of following instructions
It’s crucial to carefully read and follow the manufacturer’s instructions during the installation process. These instructions are tailored to the specific product and provide essential guidance for a seamless and secure installation.
Encouraging readers to enhance their vehicles with running boards
With the knowledge and insights gained from this article, we hope you feel empowered to embark on the installation of running boards for your vehicle. Whether it’s a Dodge Ram, GMC Sierra, Jeep Wrangler, Toyota 4Runner, Ford F-150, or any other vehicle, running boards are an excellent addition that enhances both style and functionality. Transform your vehicle and enjoy the convenience and aesthetic appeal of running boards today!
